Native Action#
Native Action allows for the creation and execution of predefined operation sequences, serving to automate the image editing process.
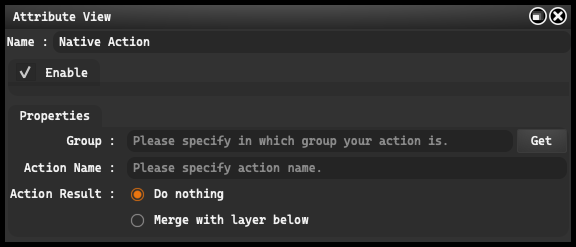
- Enable: This option allows you to enable and disable the grouping function. This can be useful when you want to temporarily disable the effects of a group to see how it impacts the overall project.
Group: enables you to determine which group your action belongs to. This is especially useful when you have multiple actions and want to organize them according to certain categories or types of operations. In this field, you can input text or use the “Get” button to select an existing group.
Action Name: in this field, you input the name of your action. This is crucial for quickly identifying and selecting the right action during work.
Action Result: defines what will happen after the action is executed.
-
Do Nothing
-
Merge with layer below
Bit Depth#
Bit Depth refers to the number of bits used to represent the color of each pixel in a digital image, which affects the number of possible shades of each color. You can choose one of three options: 8-bit, 16-bit, or 32-bit.
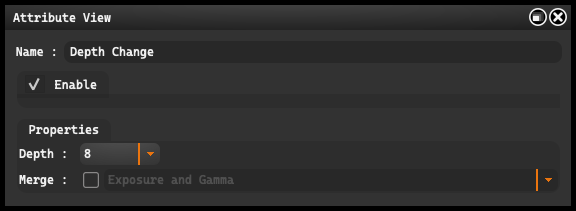
- Enable: This option allows you to enable and disable the grouping function. This can be useful when you want to temporarily disable the effects of a group to see how it impacts the overall project.
Merge allows for the selection of a method for combining different exposure layers into a single image. We can choose between “Exposure and Gamma”, “Highlight Compression”, “Equalize Histogram”, and “Local Adaptation”
Exposure and Gamma#
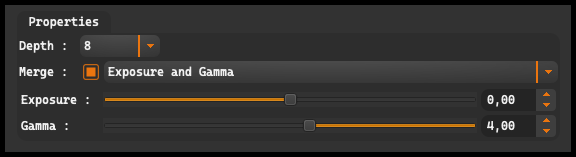
Exposure: allows for adjusting the exposure of the image. The Exposure adjustment range is from -20.00 to +20.00. Increasing the Exposure value makes the image brighter, while decreasing the Exposure value makes the image darker.
Gamma: The Gamma slider allows for adjusting the tonal density of the image. The Gamma adjustment range is from 0.01 to 9.00. Increasing the Gamma value makes the mid-tones of the image brighter, while shadows and highlights change less drastically. Decreasing the Gamma value makes the mid-tones darker, while shadows and highlights are less affected.
Highlight Compression#
Equalize Histogram#
Local Adaptation#
Edge Glow is a photo editing technique that creates a glowing effect around the edges of objects, accentuating their contours and adding depth and visual appeal to the image.
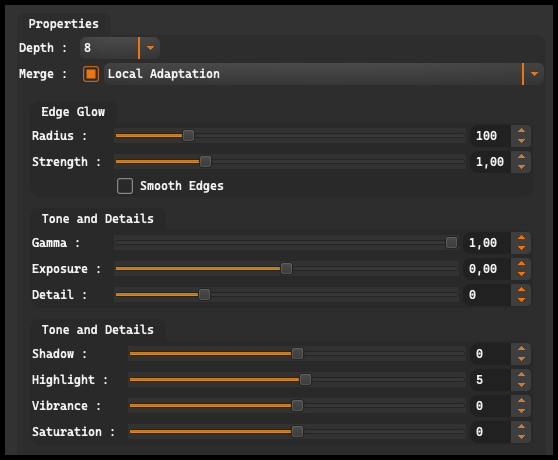
Radius: controls the size of the area where the Edge Glow effect is visible around the edges of objects. The adjustment range is from 1 to 500, meaning we can choose an effect from subtle halo on a small area to a strong glow encompassing a larger space.
Strength: influences the intensity of the Edge Glow effect. The adjustment range is from 0.10 to 4.00, which allows for adjusting the strength of the effect, from a barely noticeable halo to a strong, distinct glow.
Tone and Detail offers sliders for adjusting:
Gamma: refers to the degree of brightness or darkness of the mid-tones of the image. The Gamma adjustment range is from 9.00 to 0.10. Changing this parameter can affect contrast and color saturation.
Exposure: refers to the amount of light that falls on the camera sensor when taking a picture. The Exposure adjustment range is from -5.00 to +5.00. Reducing exposure results in a darker image, while increasing exposure results in a brighter image.
Detail: The Detail adjustment range is from -100 to 300. Increasing the Detail value typically results in an increase in sharpness and contrast in the fine details of the image, while decreasing the Detail value makes the image lose sharpness and contrast.
Tone and Detail provides control over the image’s colors.
Shadow: allows for adjusting the brightness of shadows in the image. The Shadow adjustment range is from -100 to 100. Increasing the Shadow value increases the brightness of shadows, which can help bring out details in darker areas of the image. Decreasing the Shadow value makes shadows darker, increasing the image’s contrast.
Highlight: allows for adjusting the brightness of the brightest areas, or highlights, in the image. The Highlight adjustment range is from -100 to 100. Increasing the Highlight value makes highlights brighter, which can help improve contrast and details in these areas. Decreasing the Highlight value makes highlights darker, which can help reduce the overexposure effect.
Vibrance: allows for adjusting the intensity of colors in the image. The Vibrance adjustment range is from -100 to 100. Increasing the Vibrance value enhances color saturation, making the image more vivid. Decreasing the Vibrance value makes the image color less saturated, which can give a more natural appearance.
Saturation: allows for adjusting the saturation of colors in the image. The Saturation adjustment range is from -100 to 100. Increasing the Saturation value makes all colors in the image more saturated, making the image more vivid. Decreasing the Saturation value makes colors less saturated, which can lead to a black and white effect if the value is significantly reduced.
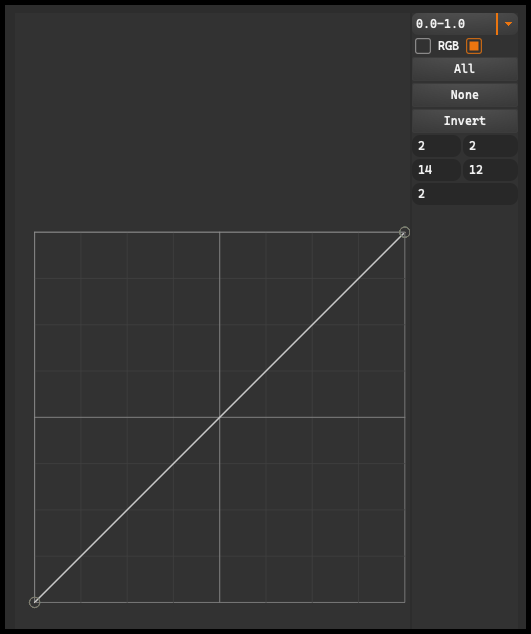
In the window below, there is a curve. This is a graph that allows for manipulation of the tones of the image, from the brightest (at the top of the graph) to the darkest (at the bottom of the graph). Moving any point on the curve up increases the brightness of that tone, while moving it down makes it darker. Next to the curve, there is a small drop-down menu, from which we can select different value ranges: from 0.0 to 1.0, from 0.0 to 255.0 or from 0.0 to 100.0.
Below the curve, there are two buttons, RGB allows for manipulating all channels simultaneously. Under these buttons, there are three more: All, None, and Invert. The All button selects all channels, None deselects all channels, and Invert reverses the selected channels.
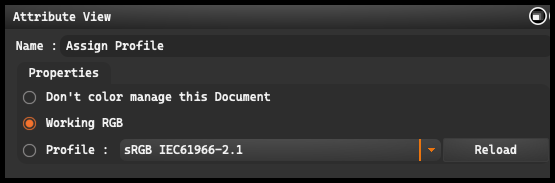
Assign Profiles#
Assign Profile allows you to assign a specific color profile to an image.
-
Don’t Color Manage This Document: This option allows you to keep the image without color management. This means that the image is not associated with any color profile. The numbers contained in the file are interpreted according to the current workspace, and the attached profile is removed.
-
Working RGB: This option allows you to assign the image to the profile of the current workspace. The numbers in the file are preserved, but they are interpreted according to the current workspace. The image is treated as tagged, so it retains this profile if you later change the workspace.
-
Profile: This option allows you to assign the image to a profile other than the default workspace profile. The numbers in the image are preserved, but they are interpreted according to the profile you have assigned. Available profiles to choose from are: sRGB IEC61966-2.1, Adobe RGB, Adobe RGB (1998), ColorMatch RGB, Image P3, and ProPhoto RGB.
Reload: This option, located on the right side, allows you to refresh the profile settings.
Convert to Profile#
Convert to Profile allows you to convert a document from its current color space (profile) to any other profile space, with the ability to precisely control the conversion process.
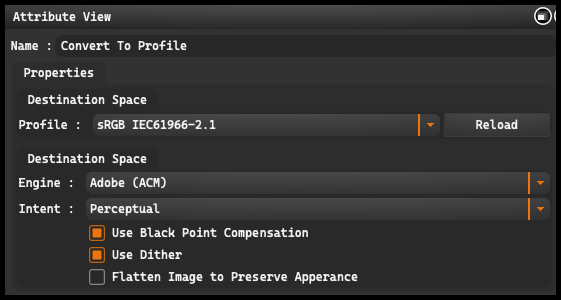
Profile Allows you to select the target profile for the conversion. The available options are: sRGB IEC61966-2.1, Adobe RGB, Adobe RGB (1998), ColorMatch RGB, Image P3, and ProPhoto RGB.
Reload: This option, located on the right side, allows you to refresh the profile settings.
Engine refers to the color management engine, which is responsible for processing and converting colors between different profiles.
Adobe (ACE): This is the Adobe Color Engine color management engine.
Microsoft ICM: This is a color management engine from Microsoft, integrated with Windows.
Intent determines how colors will be remapped during conversion between different color spaces.
Perceptual aims to maintain visual color harmony. It can change both in-gamut and out-of-gamut colors to ensure the most natural and eye-pleasing transformation.
Saturation aims to maintain or enhance color saturation during conversion, regardless of exact color accuracy.
Relative Colorimetric focuses on color accuracy. Colors that are within both gamuts are left untouched, and those outside the target gamut are adjusted to the closest possible equivalent.
Absolute Colorimetric focuses on color accuracy, but does not make any adjustments based on the white point.
-
Use Black Point Compensation: Allows for black point compensation in the conversion process.
-
Use Dither: Allows for the use of dithering technique, which helps to minimize visible artifacts and color errors during conversion.
-
Flatten Image to Preserve Appearance: This option flattens the image, allowing it to maintain its appearance post-conversion.
Set Working Space#
Set Working Space allows the user to define the RGB color space that Photoshop uses for displaying and editing images.
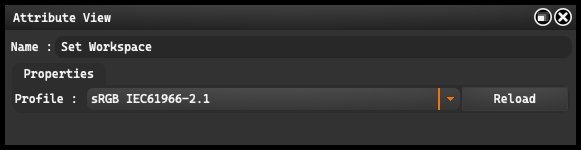
Profile: allows you to select the target profile for the conversion. The available options are: sRGB IEC61966-2.1, Adobe RGB, Adobe RGB (1998), ColorMatch RGB, Image P3, and ProPhoto RGB.
Reload: this option, located on the right side, allows you to refresh the profile settings.