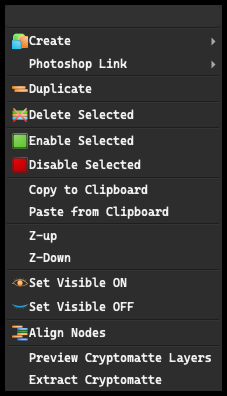
Main Toolbar#
-
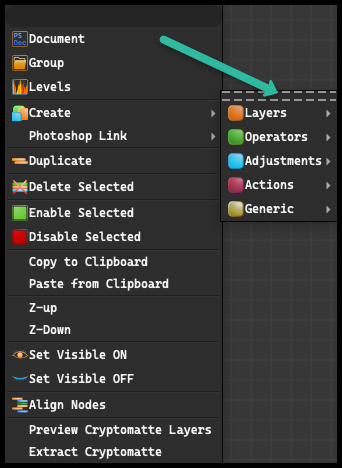
Create: Allows you to create main layers, adjustments, and more. This will be further explained in a separate section.
-
Photoshop Link: Enables dynamic data transfer between Photoshop and Icarus, streamlining editing.
-
Duplicate: Creates a duplicate of the selected object.
-
Delete Selected: Removes the selected object from the workspace.
-
Enable Selected: When selecting multiple objects, you can define whether they should be enabled. This option can be useful for node editing, allowing you to control the activation of specific nodes within a selection.
-
Disable Selected: When selecting multiple objects, you can define whether they should be disabled. This option can be useful for node editing, allowing you to deactivate specific nodes within a selection.
-
Copy to Clipboard: When an object is selected, using this function or the Ctrl/cmd + C shortcut allows you to copy the selected object to any location in the workspace.
-
Paste from Clipboard: When an object is selected, using this function or the Ctrl/cmd + V shortcut allows you to paste a previously copied object to any location in the workspace.
-
Z-up: Adjusts the position of nodes, typically referring to moving them upward along the Z-axis in node editing.
-
Z-Down: Adjusts the position of nodes, typically referring to moving them downward along the Z-axis in node editing.
-
Set Visible ON: Makes icons lighter, allowing you to see them in Photoshop when stacked.
-
Set Visible OFF: Makes icons appear very grey, preventing them from being visible in Photoshop when stacked.
-
Align Nodes: Aligns all nodes in the workspace, ensuring a consistent layout.
-
Preview Cryptomatte Layers: This option allows you to preview cryptomatte layers in node editing.
-
Extract Cryptomatte: This option enables the extraction of cryptomatte information in node editing.
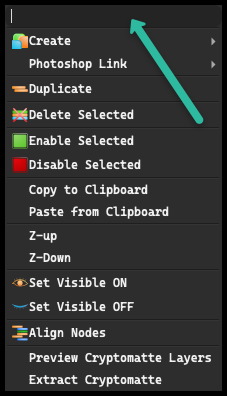
At the top of the dropdown menu, there is a search bar that allows you to quickly find the operations, filters, and other content you are looking for.
With this feature, you can enter the desired keyword and instantly get results that match your preferences.
The search bar enables efficient and effective navigation through the menu, making it easier to find the information you need in a fast and convenient manner.
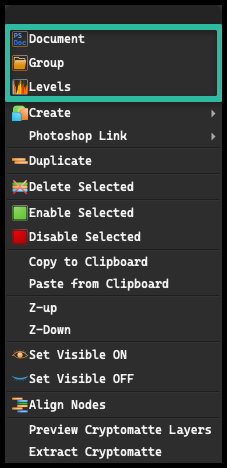
At the top of the menu, there is a section displaying the 3 most recently opened objects that were used in the application.
This feature allows for quick access to recently used items, providing convenience and time-saving.
With this, without the need to search through the entire menu, we can easily return to recently used objects and continue working with them.
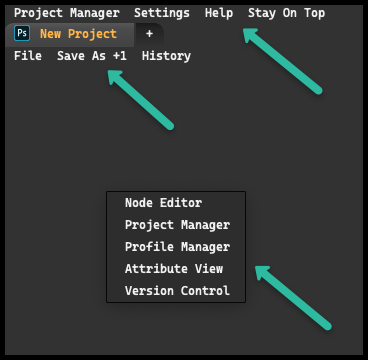
There is also an option to detach tabs. Simply left-click on the dashed double lines located at the top of each expandable tab.
This allows users to easily detach the tab and place it anywhere on the screen, optimizing the workspace and improving interface organization.
Application#
After launching the application, we are presented with the main window where we can see two menus.
The first one, located at the top, contains general application functions, while the second one focuses on options specific to the currently open project.
Below the project menu, there is the working area, where the user can directly manipulate their project.
Additionally, the working area offers the ability to customize the view by right-clicking, which brings up a menu with various view options that can be stacked to the working area, allowing for a personalized working environment.
The main window of the Photoshop Stack application offers many features for customizing and optimizing the workspace. Here are some basic operations that can be performed:
-
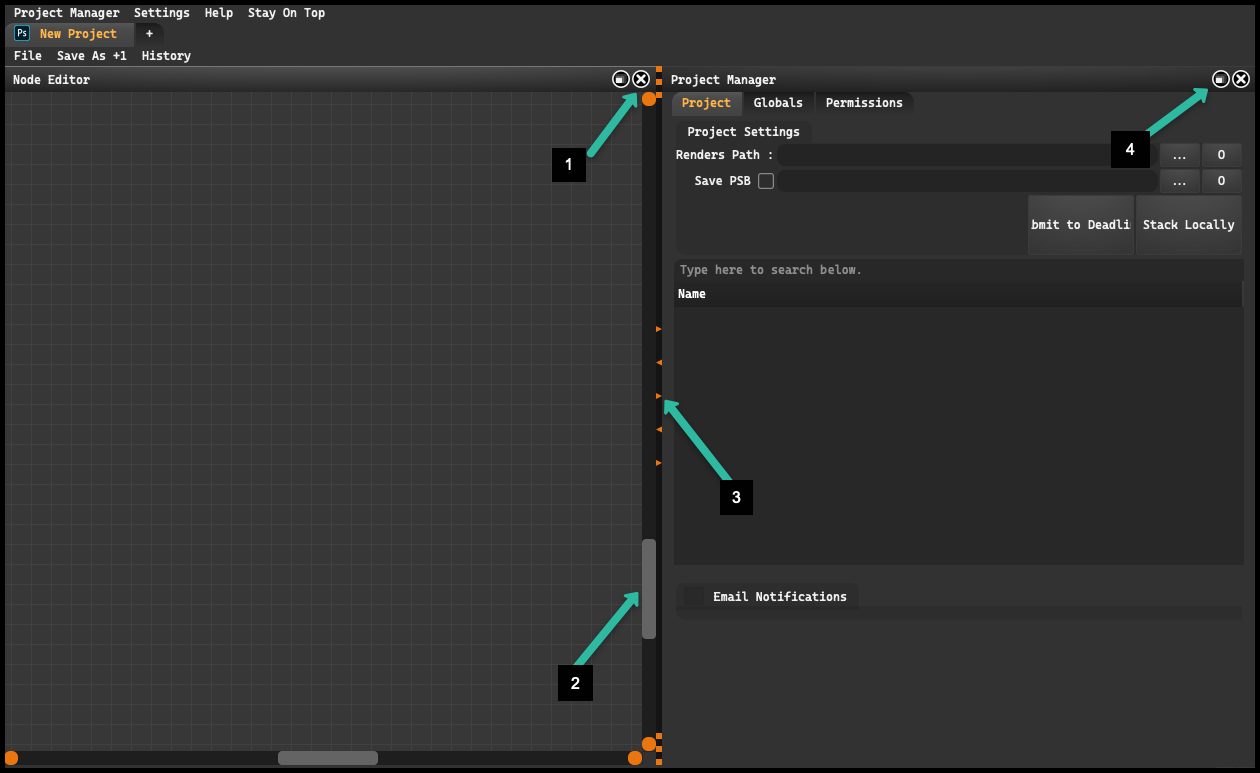
Closing tabs: Each tab in Photoshop Stack has a function that allows it to be closed. This is useful when we want to finish working on a particular project or organize our workspace.
-
View control using the slider: By clicking the left mouse button on the slider, users can adjust the view of the project. This allows focusing on a specific part of the project without the need to manipulate other tabs.
-
*Changing the size of the tab: In Photoshop Stack, we can easily resize the tab. By clicking the left mouse button on the appropriate marker, users can adjust the size of the tab according to their needs.
-
Detaching the tab: By clicking on the appropriate symbol, the selected tab can be “detached” from the main application window. This allows placing the tab anywhere on the screen, which can be convenient for multitasking or working with multiple projects simultaneously.
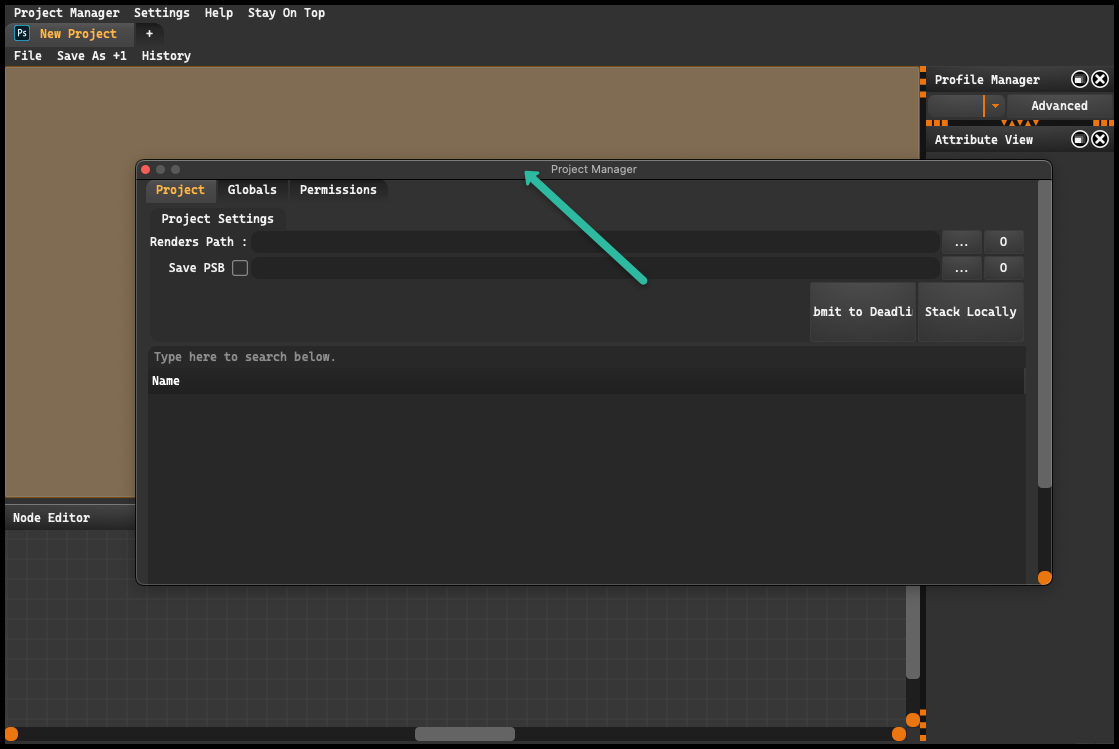
By holding and dragging the tab bar, you can easily move it and position it anywhere within the project according to your preference.
Our workspace is designed with easy navigation in mind. You can easily zoom in or out of the view using the scroll function on your mouse. The zooming point is precisely determined at the cursor location, allowing for quick and accurate focus on the selected area of the project. This solution facilitates navigation, especially in large and complex projects.