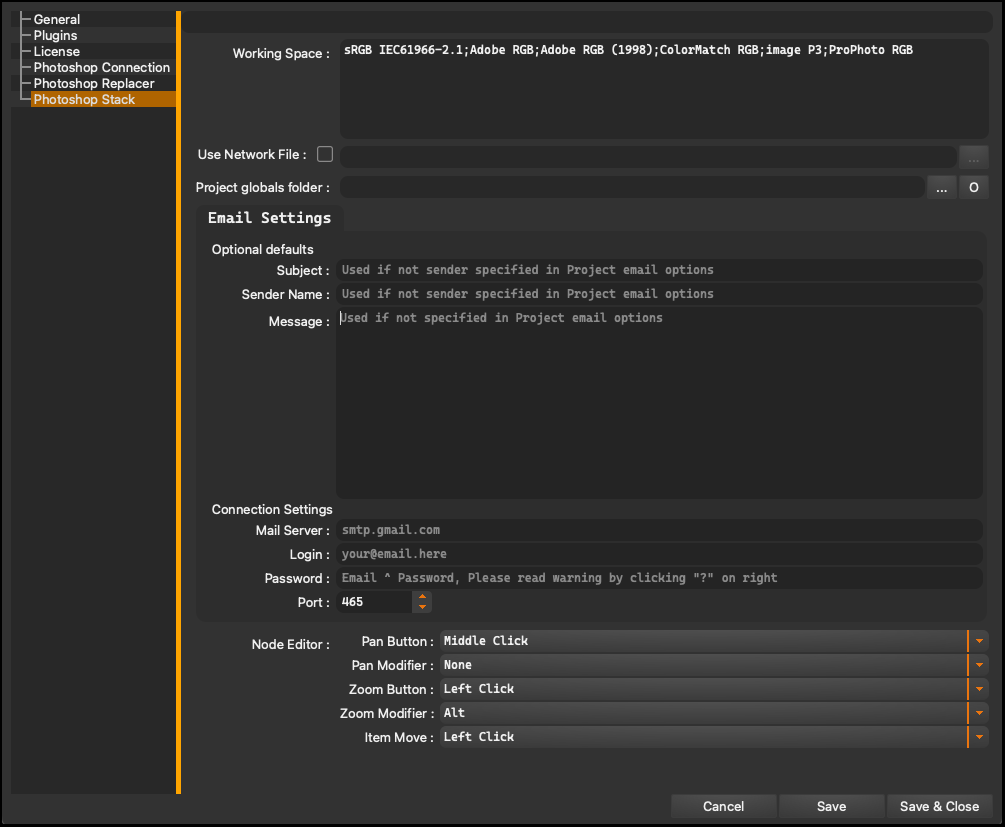
The tab is dedicated to advanced features related to process management and communication with other software modules. It contains several key configuration elements that help optimize and customize the process to the user’s individual needs. These elements include plugin location, working space, the ability to use network files, project global folder, and password generation. Additionally, this tab also includes email settings, allowing customization of default settings, subject, sender name, and message content. The connection settings section allows configuration of the mail server, login, password, and port, while the node editor provides control over buttons.
Working Space#
This section in the application allows users to manage the color spaces used in Adobe Photoshop. A color space, also known as a color profile, is a set of information that defines how colors are interpreted and displayed on the screen.

Within the “Working Space” tab, various predefined color spaces are available, such as “sRGB IEC61966-2.1,” “Adobe RGB,” “Adobe RGB (1998),” “ColorMatch RGB,” “image P3,” and “ProPhoto RGB.” Each color space has its unique properties and is suitable for different applications, such as web design, photography, printing, and more.
Additionally, users have the option to add their custom color spaces. To do this, enter the profile name exactly as it appears in Photoshop. If you want to add multiple profiles, separate the names of each profile with a semicolon ;
Work Network File#
The options is a feature in the application that allows for the synchronization and sharing of working spaces among multiple users working in a network. This is particularly useful in environments where multiple artists or designers collaborate on the same project, requiring consistency in color settings and interpretation.
The feature enables the sharing of the same color space settings for all users in the network, ensuring uniform and consistent results. Users can select a shared working space and apply it to their workstations, guaranteeing that everyone sees and interprets colors in the same way.
On the right side, there is a “Browse” option that, when clicked, allows you to add a specific file to the network. This file should be placed in a specific location accessible to all collaborating users.
Project Global Folder#
The options is a feature that allows for the sharing of entire folders within a network. This enables users to synchronize and access project resources that are shared among multiple individuals working simultaneously.
Email Settings#
This option is intended for configuring email notifications that are sent to users upon completing work on a project.

In the “Optional Defaults” section, we can set default values for three fields:
-
Subject is the field where you can set a default subject for the sent emails.
-
Sender name allows you to set a name that will be displayed as the sender of the email messages.
-
Message is the field where you can enter the default content of the message that will be sent to users.
These values will be used every time the program sends a notification about a completed project. However, the recipient of the email message can only be specified from within a specific project when the “Email Notification” feature is enabled.

The “Connection Settings” section is necessary for configuring the connection to the mail server:
-
Mail Server - is the field where you should enter the SMTP server address used for sending emails. The address depends on your email service provider.
-
Password - It requires entering a password that is identical to the password used to log in to the user’s email account.
-
Login - is the fields where you enter your login credentials for your email account. These credentials should be the same as those used to log in to your email account.
-
Port is the field where you enter the port number used for the SMTP server connection. The port number also depends on your email service provider.
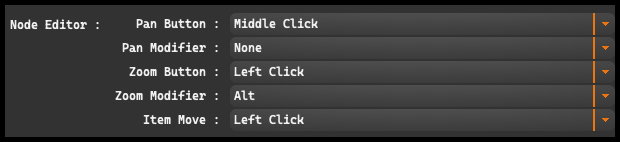
Node Editor#
Certain keyboard and mouse buttons have been designated with functions to enhance navigation and manipulation of nodes. These shortcuts play a crucial role in interacting with the node editor, enabling swift and efficient creation and modification of node trees. Within the settings, each visible button offers the option to assign a custom shortcut to it.